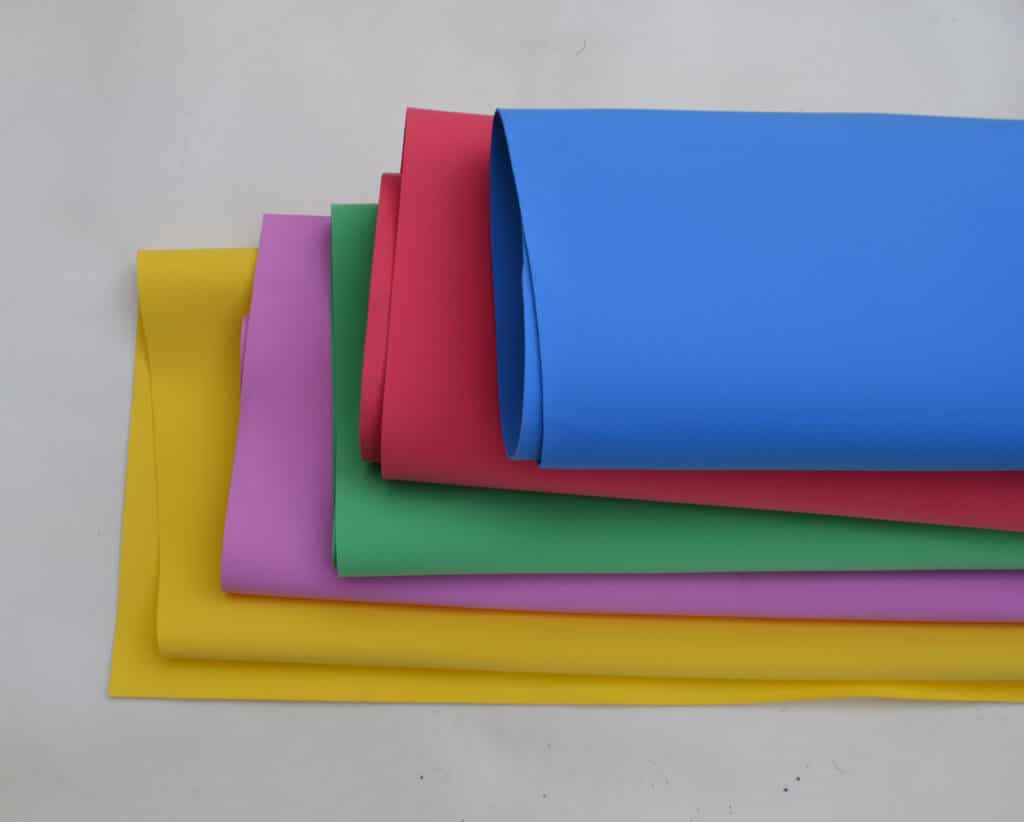
What is foamiran
Foamiran - This is a modern material resembling plastic suede. This is a pretty plastic cloth that bends and well retains any shape that you betray to him. Thanks to such qualities, foamiran is much more valued for creating flowers than ordinary corrugated paper. After all, such flowers will last much longer than the last.
Peony from foamiran
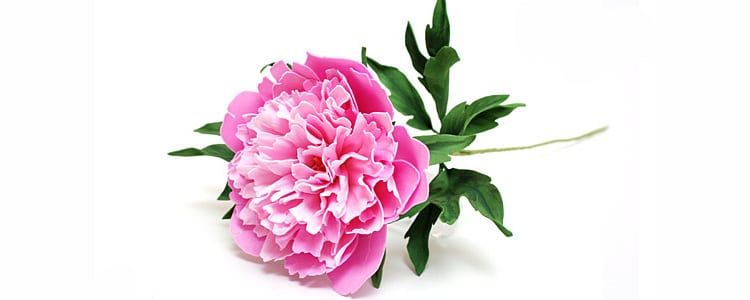
We will need a material with a thickness of at least 1 mm to make the craft voluminous and strong. Colors: dark green, dark pink and light pink. You will also need green isolate, water-based paints, durable wire, glue gun, and any decor to form the core of the flower.
Step 1.
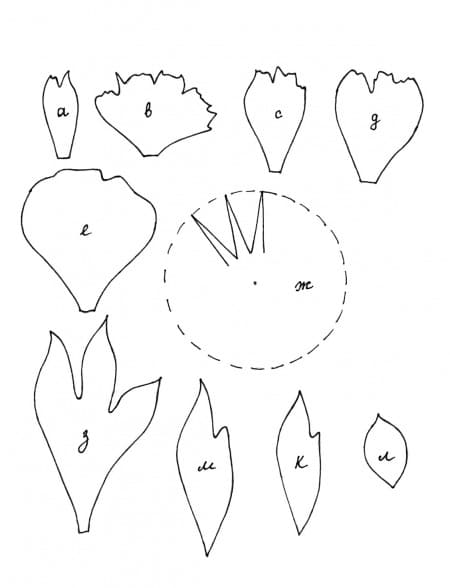
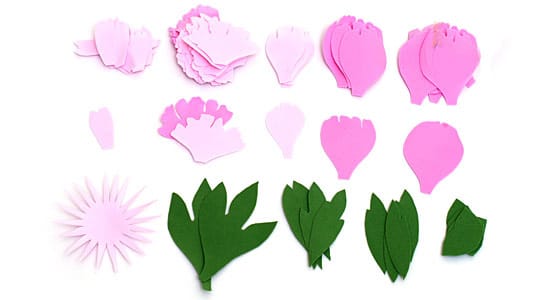
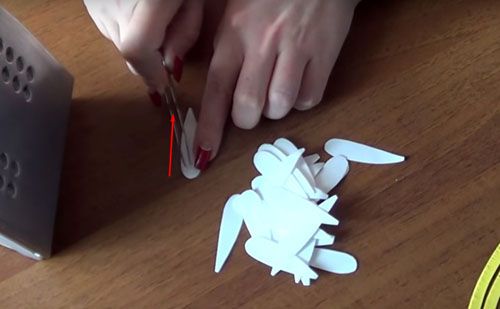
We form a pattern of plain paper. To do this, simply draw future petals on paper or print our photo hint on a printer. When the blanks are drawn, proceed to cutting them, where you should be able to:
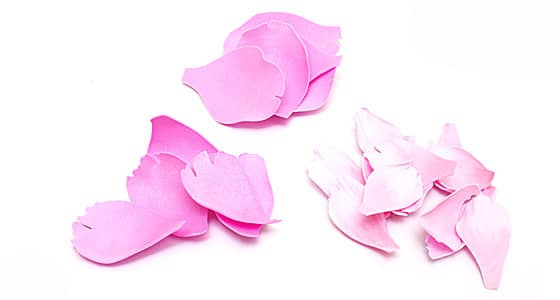
- Petals A - 10 light pink;
- Petals B - 10 light pink and 5 dark pink;
- Petals C - 10 light pink;
- Petals D - 5 dark pink;
- Petals E - 5 dark pink;
- Leaflets 3 - 3 dark green;
- Leaflets M - 6 dark green;
- Leaflets K and L - 5 dark green;
- Core Zh - 1 piece (we cut out sharp rays from the circle).
Step 2
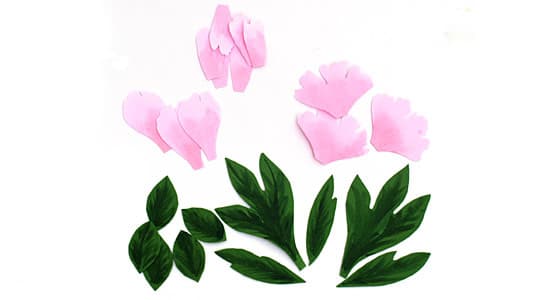
You need to color your petals so that the color on the petal is darker towards its edge and base. This way we get more realistic flowers. If the petal is dark pink, then use a dark pink paint. Petals need to be painted on both sides.
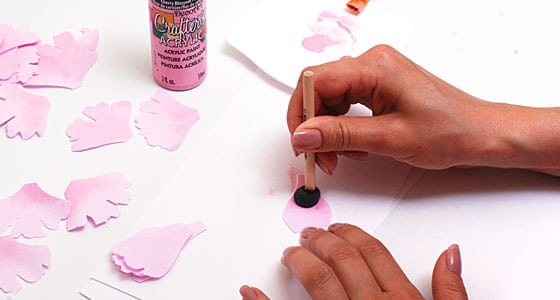
And then move on to painting the leaves. On one side of which, you need to draw veins, like a real plant. See our photo hint.

Step 3
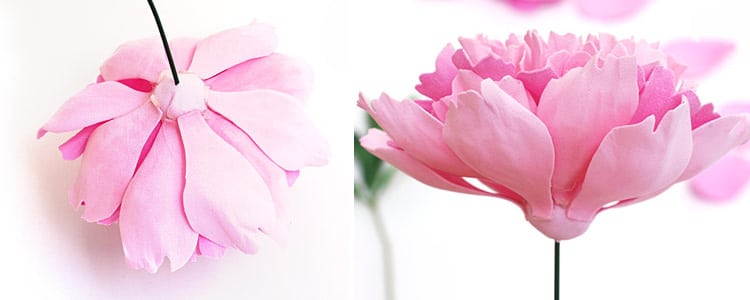
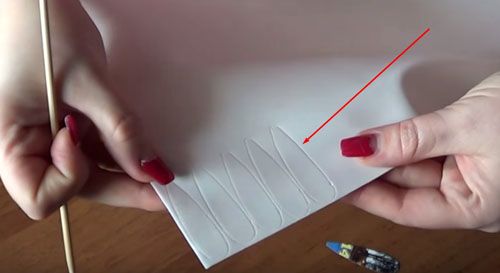
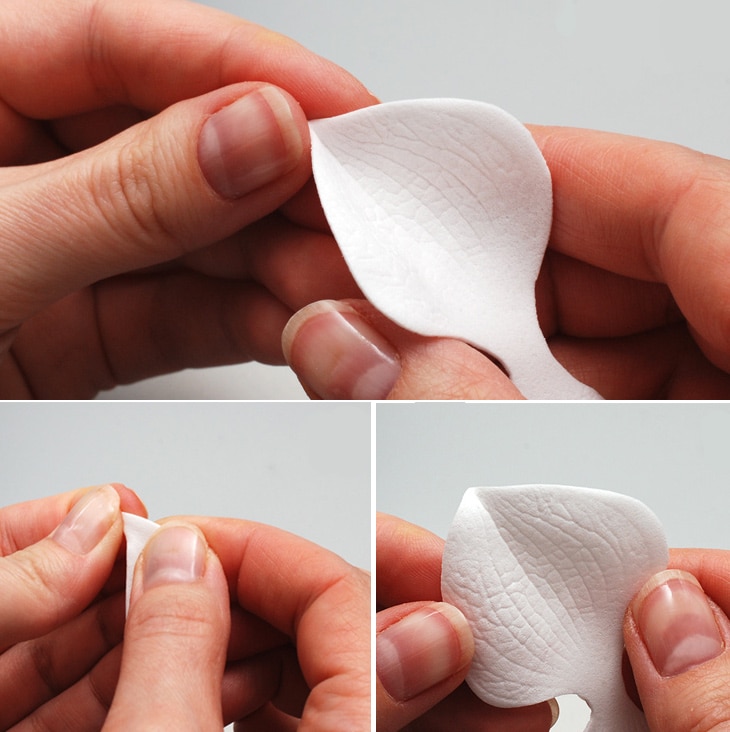
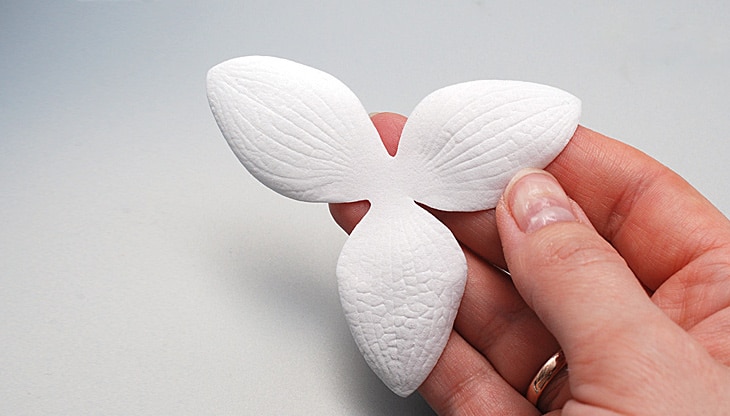
To make our petals voluminous, they need to be folded correctly. The corrugation of the petals begins with the letter B, which we add up with an accordion. The upper part of our petal needs to be twisted more tightly, and when you expand the petal you will see how realistic it is.
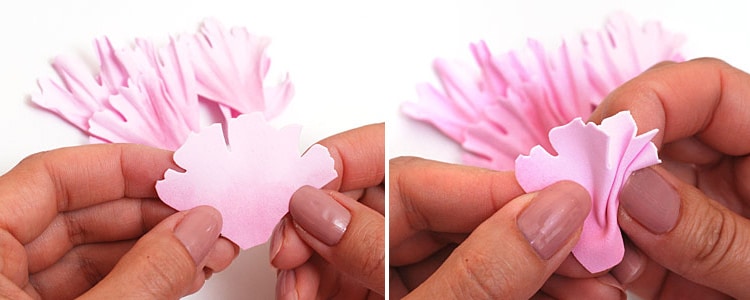
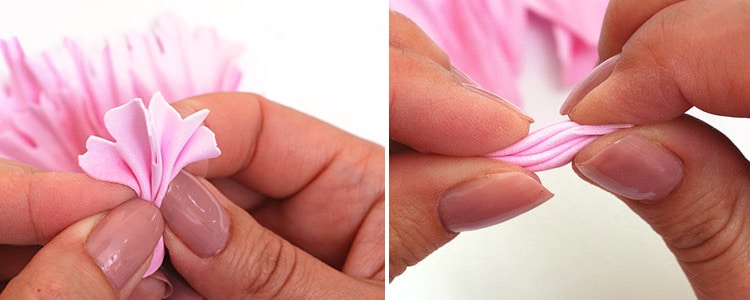
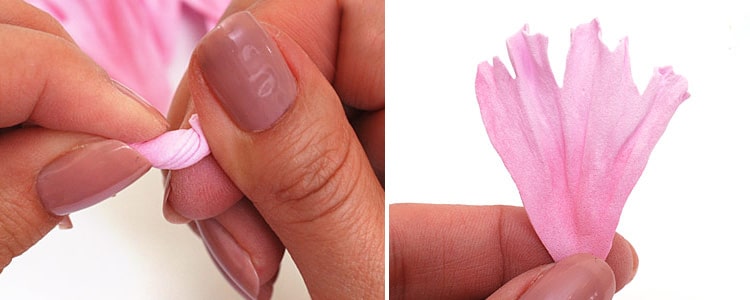

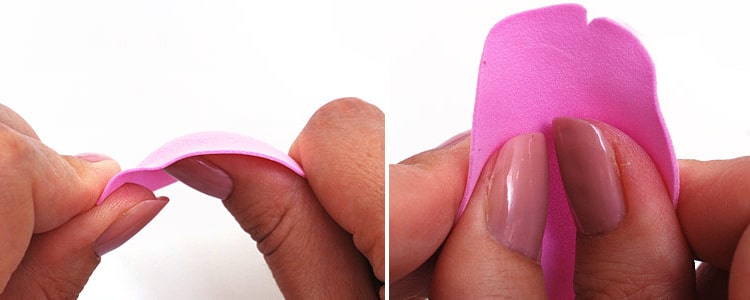
Next, do the same with the petals of group A. But the petals of group D, you need to do it differently. You need to give them a concave shape, as indicated in the photo. We do the same with the petals of group E.
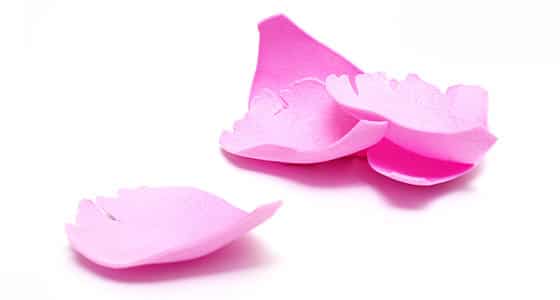
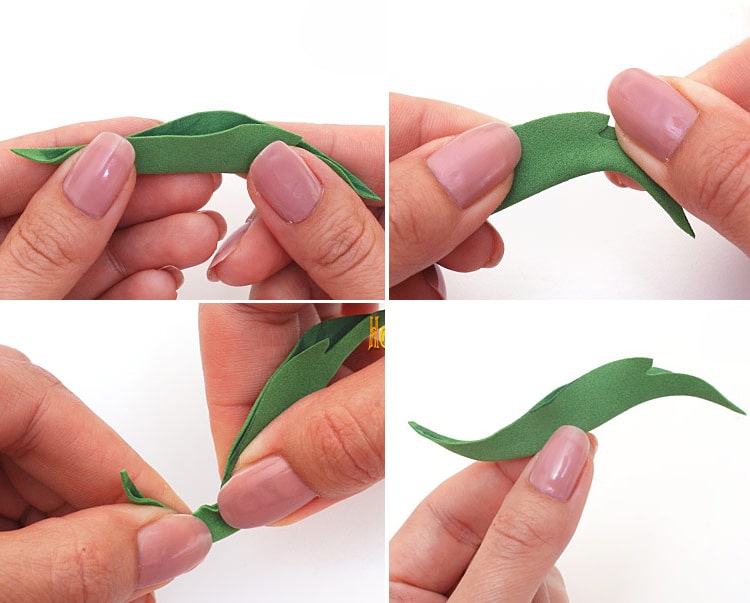
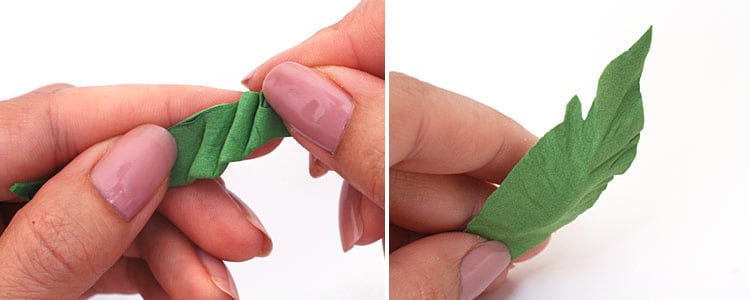
And petals C, we also do as a group of petals B. Now we turn to our leaves. They need to be folded in half and stretched. Crumple the foamiran on the sides with folds to create a leaf frill effect.


Step 3
We make a large ball out of foil, which will be the main one for our flower. The diameter of the ball should be approximately 1.5 cm. Using glue, we attach our wire to the ball, and we put the core blank on it, as indicated in the photo.
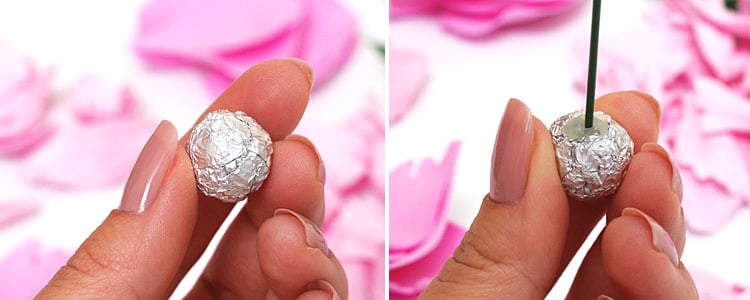
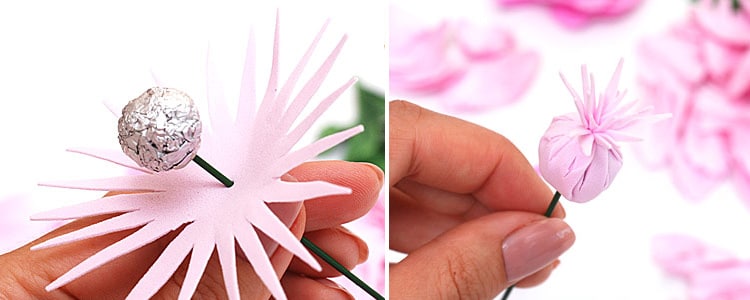
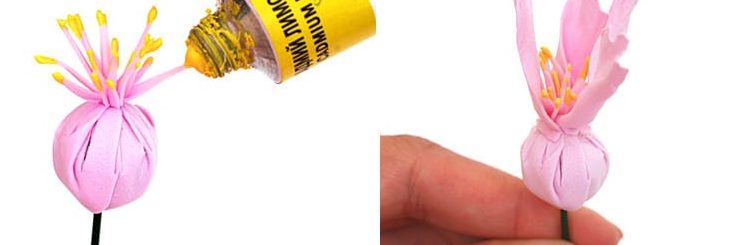
We turn off the sharp rays of the workpiece and with the help of yellow paint we make stamens. Next, using a glue gun, you need to glue ten petals of group A to the core. After that comes the turn of group B - alternating dark pink and light pink.
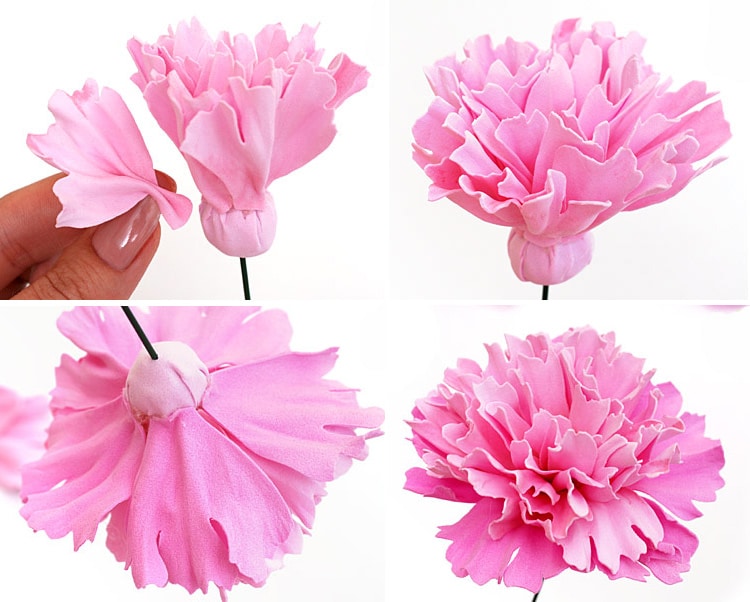
The next row is the petals of group C - 5 pieces, and after another 5 groups C. Then we glue the group D - 5 pieces, placing them in a checkerboard pattern. The completion of the bud will be the largest petals. Then you need to glue the leaves of group K and L.
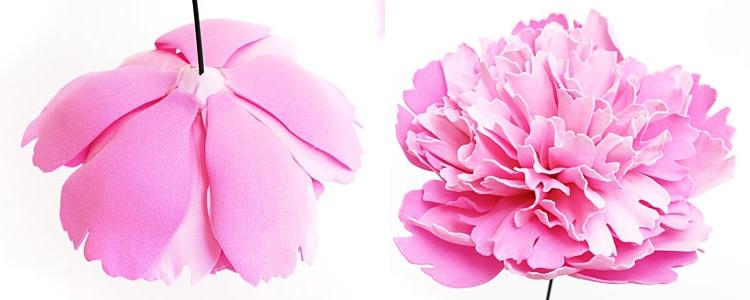
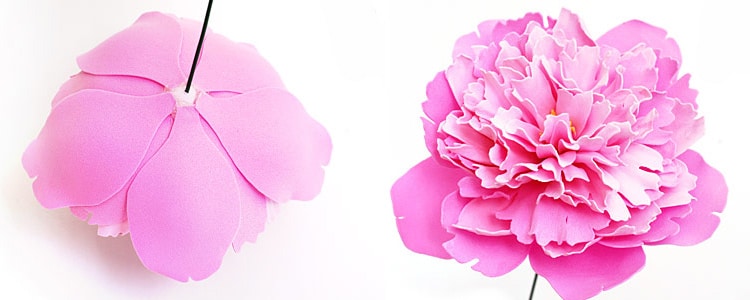
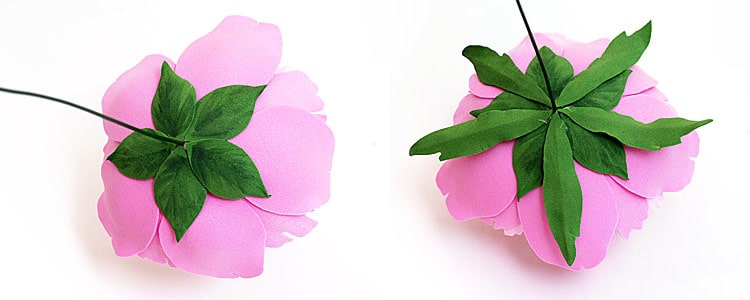
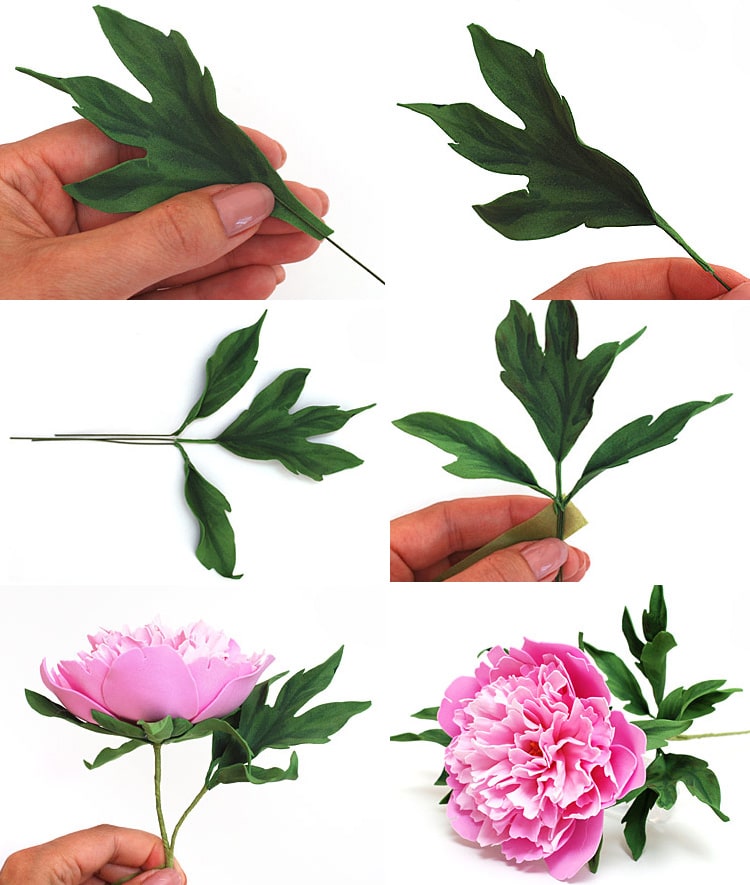
As a result, we got such a beautiful, delicate and voluminous peony.
Foamiran Lily
Materials:
- Foamiran green and white;
- Water based paints;
- Cardboard sheet;
- Stamens;
- Glue gun;
- Thick wire;
Step 1.
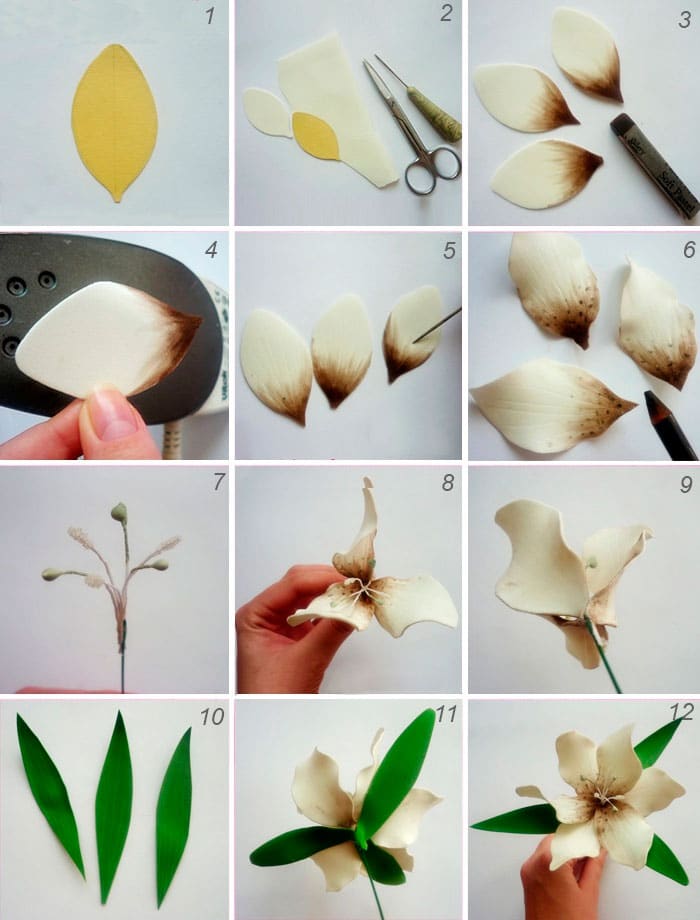
- On a sheet of cardboard you need to draw a petal, like a lily flower is no more than 6 cm in length. With this template you can cut a beautiful leaf from foamiran. You will need to make 6 pieces of such petals.
- Using acrylic paints, you need to paint over the petals, as indicated in the photo, to give them the most natural look. And then we proceed to heating. You need to heat the iron and warm each petal on it so that while the material is warm you can make an imitation of veins on it, like real lily petals.
- Then our stamens must be glued to the wire and cut out three long green leaves from foamiran. To give texture to leaflets, you can also heat them on the iron. Now it’s worth moving on to flower formation. First, glue three petals around the stamens, and glue the others in a checkerboard pattern. The last touch will be to stick green leaves on the lily flower.
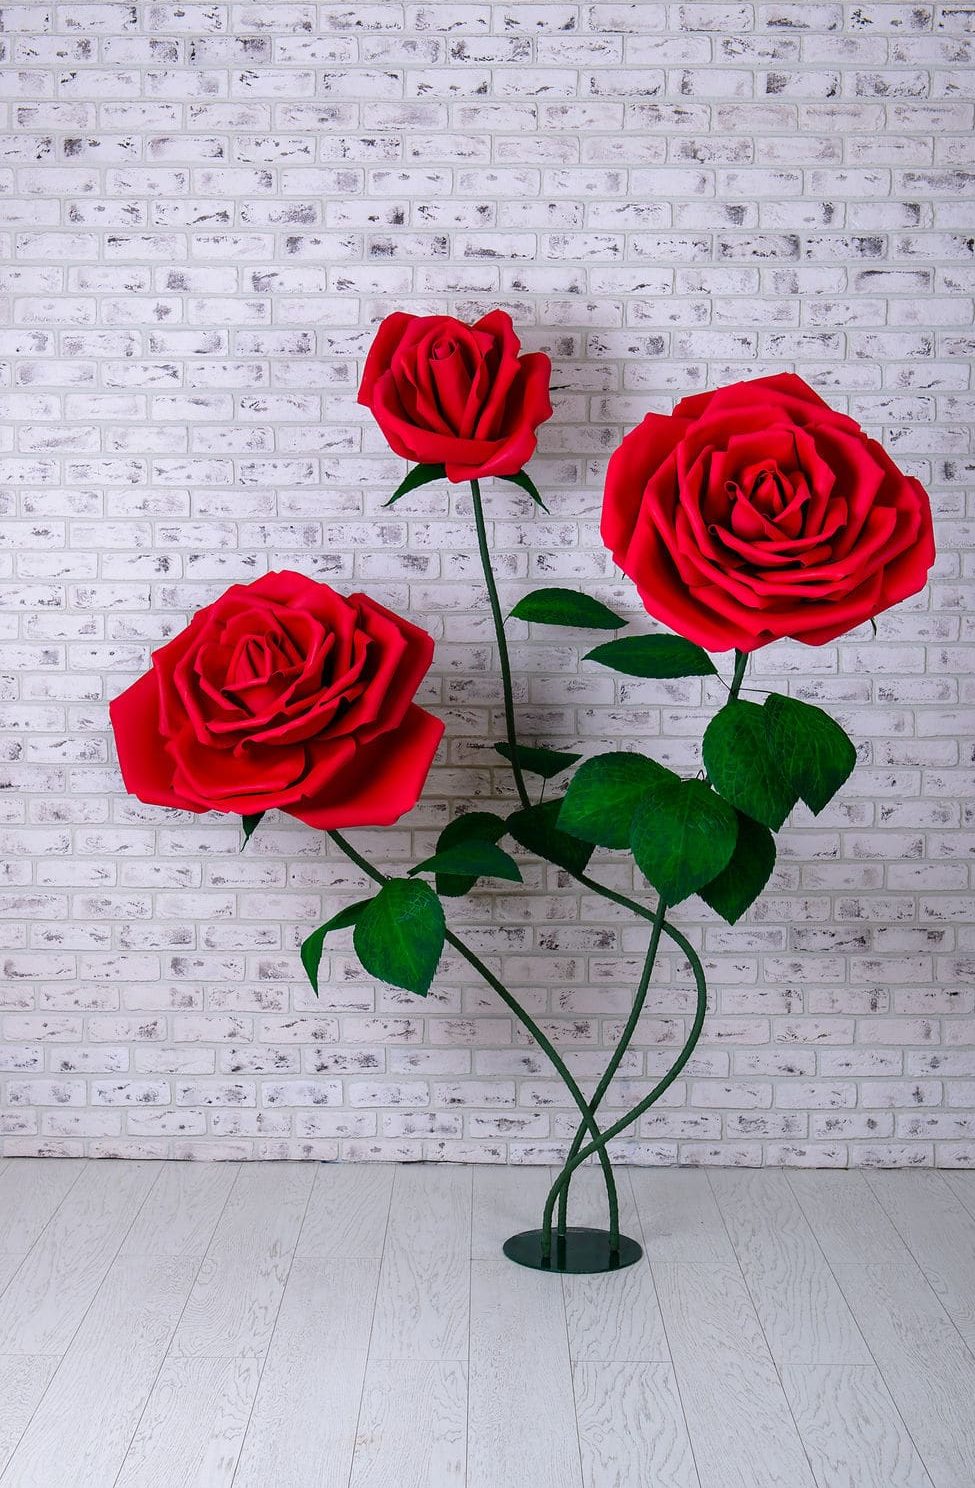
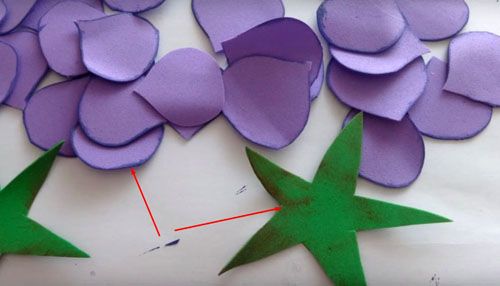
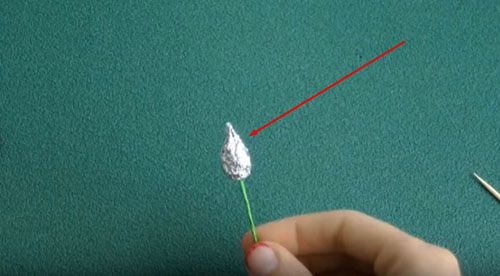
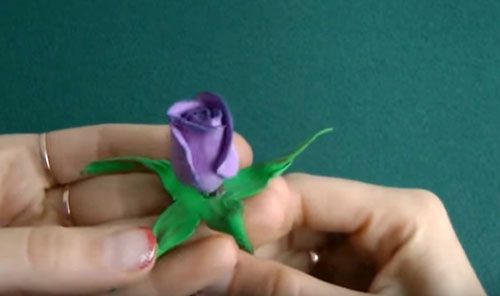
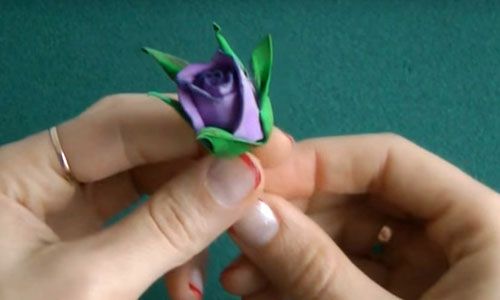
Rose from foamiran
To correctly make a rose flower from foamiran, you need to cut out the blanks of the petals and leaves. To do this, take a thin cardboard and draw our blanks, which are then cut along the contour. To make the rose bright, choose a beautiful foamiran color. It can be whatever you want.

Step 1.
When your petals and leaves are cut, you need to paint them with acrylic paints, making the color darker to the edges and base.
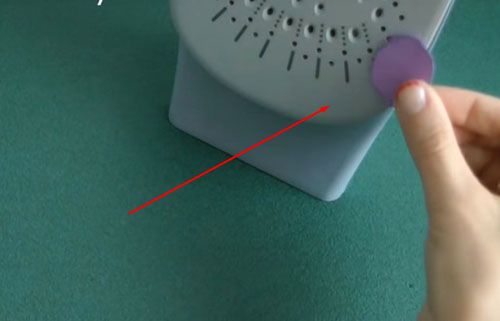
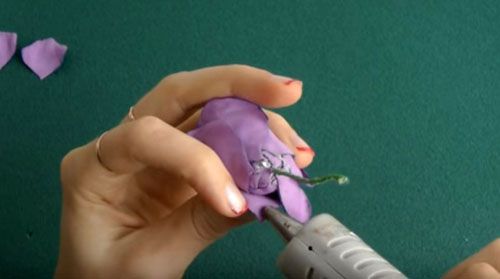
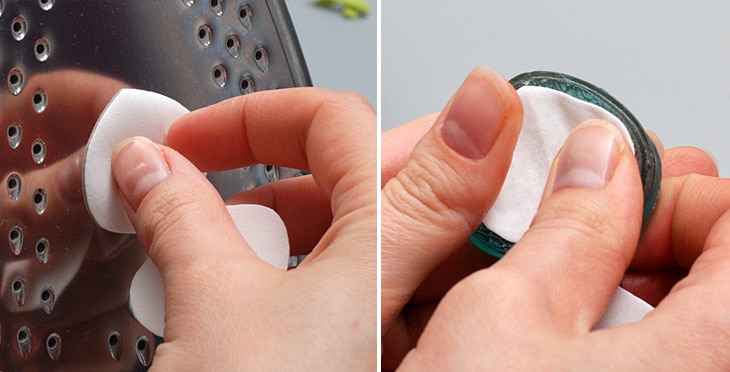
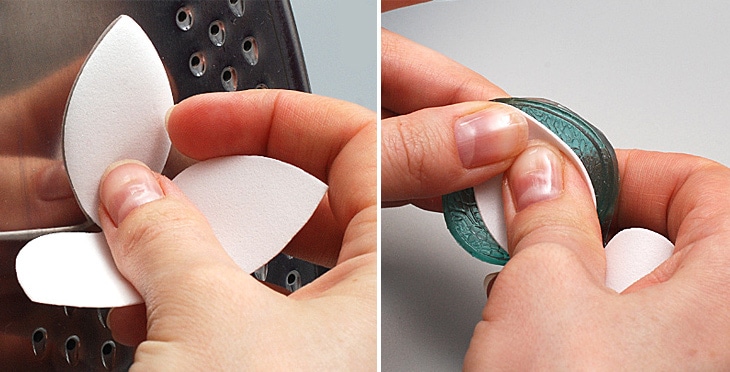
Then it is necessary to warm up the petals on the iron, in order to give them the desired shape afterwards. And to do it right, you need to twist each petal, and then stretch it.
Wrap the wire with green type tape and form the core of the flower from the foil, which you need to fix with the glue gun. Then proceed to sticking our petals on the foil.
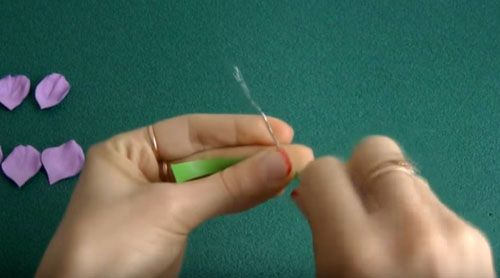
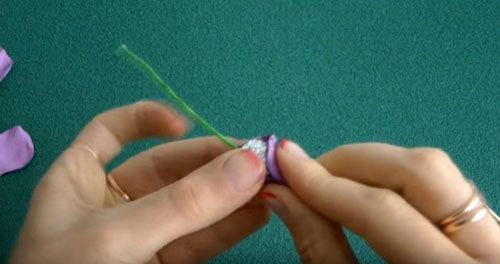
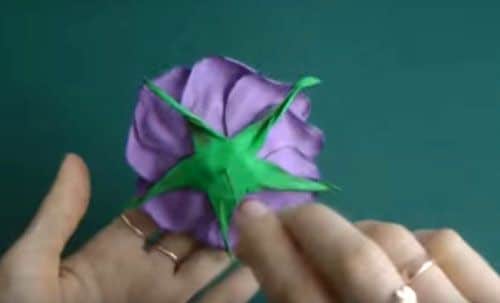
Heat the leaves on the iron in the same way to form twisted leaves out of them. String it on a wire and attach it to the base of the flower. Continue gluing the petals onto the rose, alternating the petals and gluing them in a checkerboard pattern.
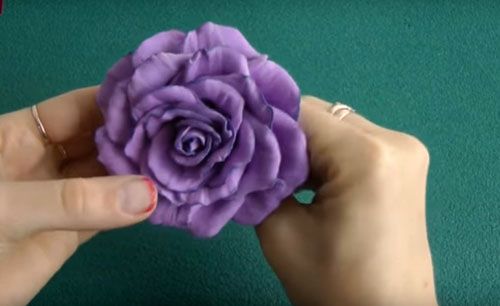
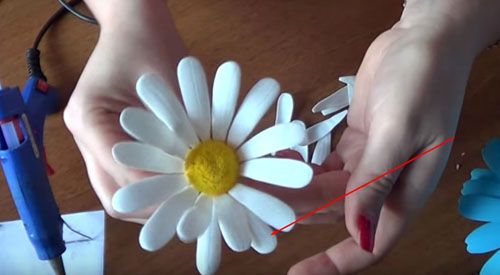
Camomile from foamiran
Chamomile will require a lot of time from you, as the flower has many small details. You need to cut 30 petals of oblong shape from white foamiran.
From yellow foamiran you need to make a fringe.

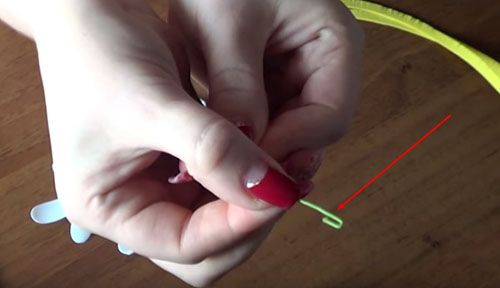
Then heat the petals on the iron and give them texture. Then you need to bend the tip of the wire so that you get a small hook. It is on it that you need to string fringe, thereby forming the middle of the flower.
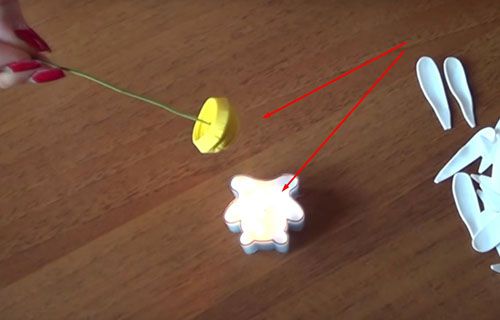
Now start sticking the petals to our core with a glue gun. When the first row of petals is formed, the second should be glued a little lower, positioning so that they are between the upper petals.

But the back side of the flower needs to be sealed with any curly detail or attached with double-sided tape. Now such a flower can be glued to the refrigerator, which will help refresh any environment.
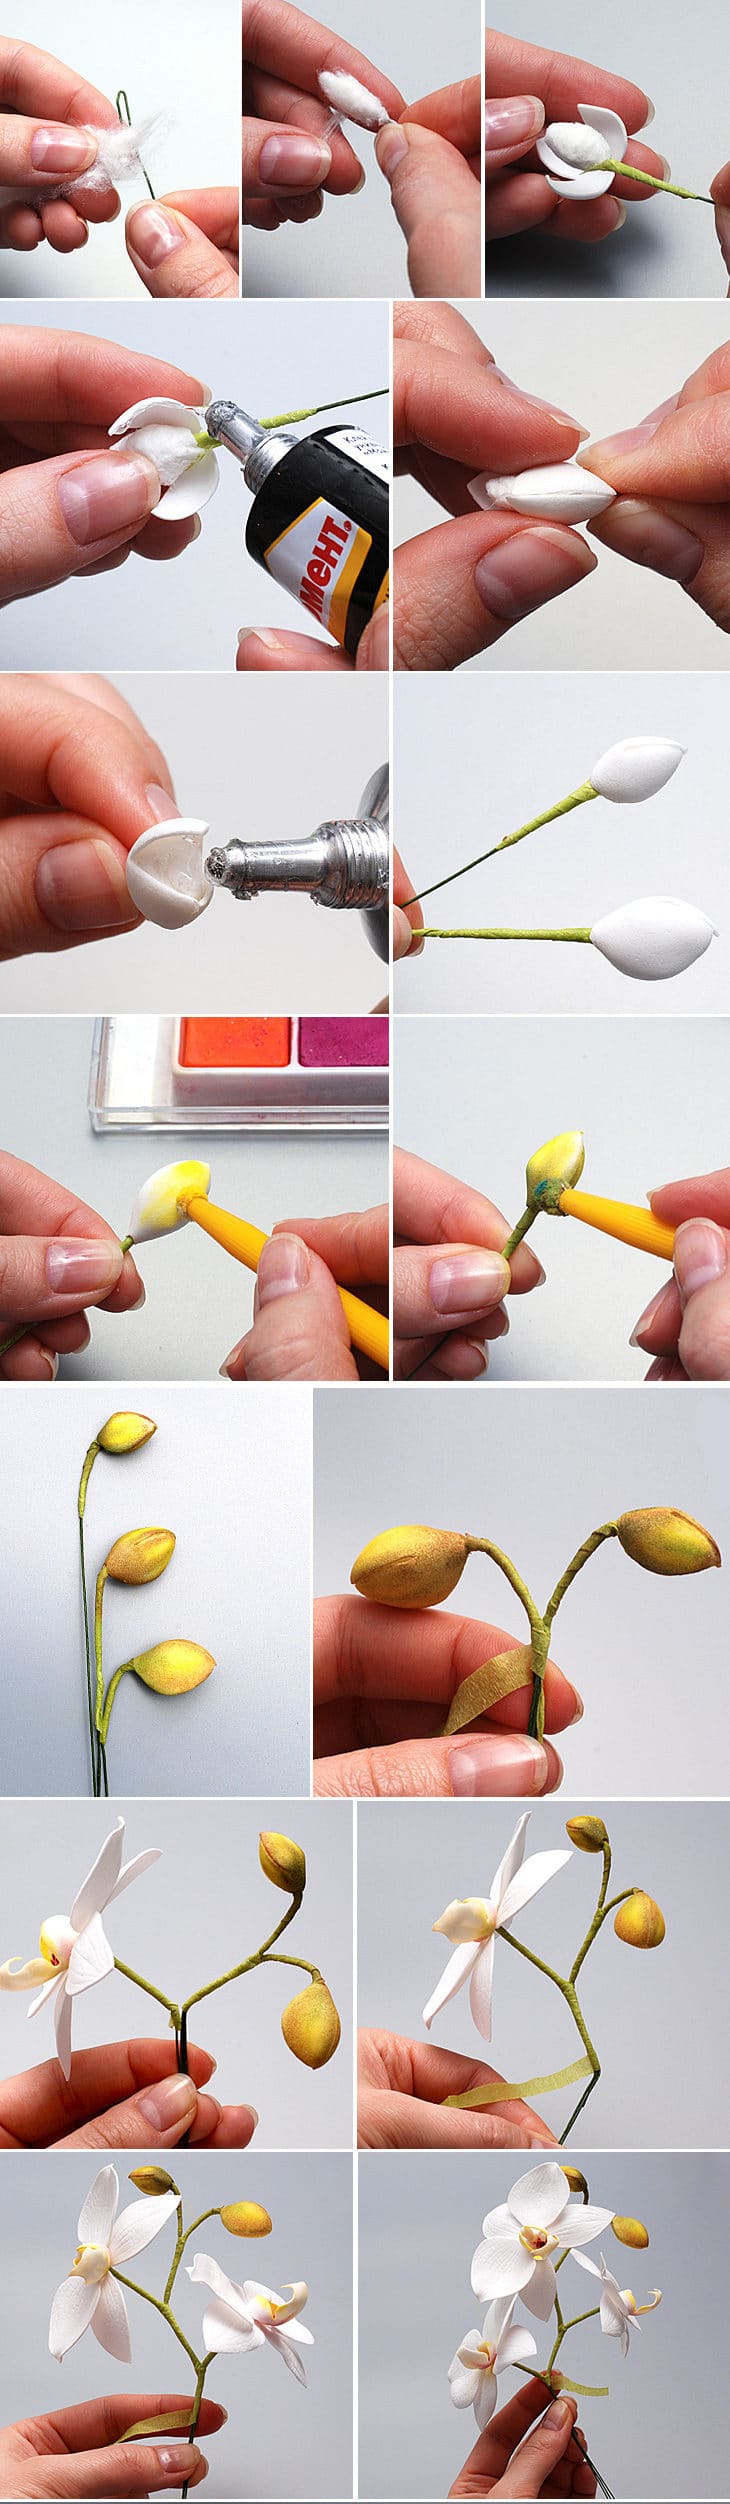
Foamiran Orchid
- You will need a white foamiran;
- Durable wire;
- The electrical tape is light and dark green;
- Water based paints;
- Glitter glue.
Step 1.
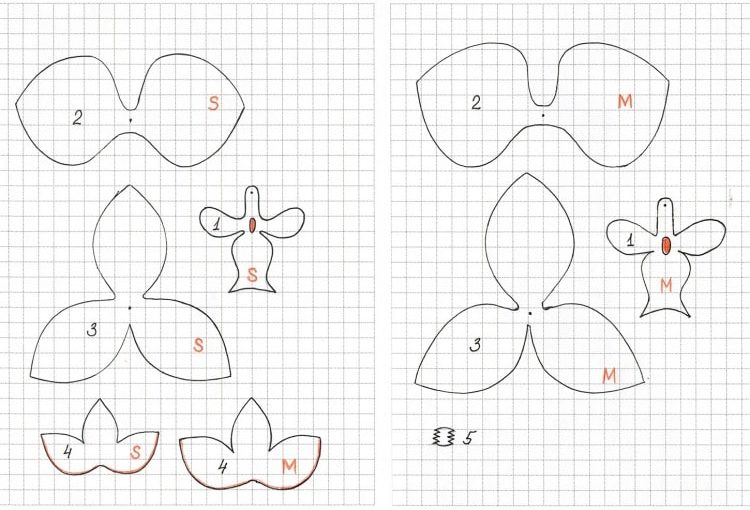
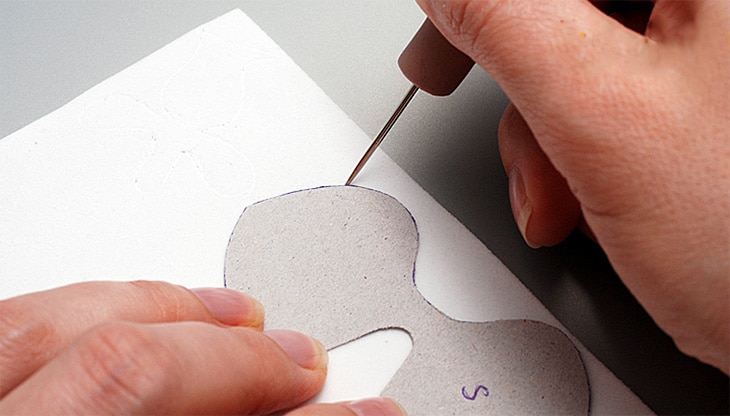
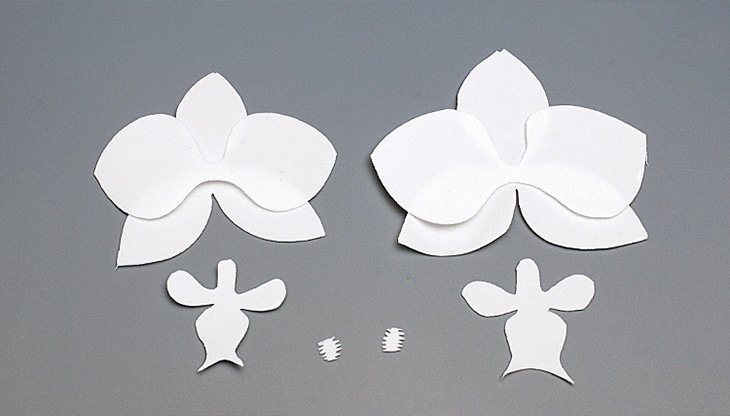
First you need to print our template, according to which you will then cut the petals. You need to cut the details clearly along the contour and exactly the quantity indicated on the template.
Step 2
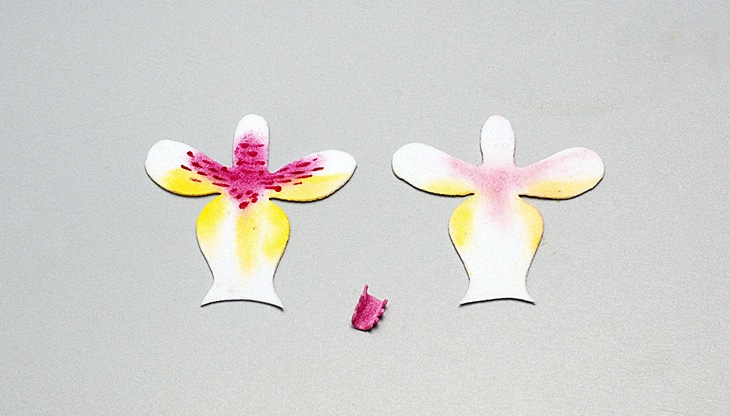
Each petal you need to be painted in bright yellow and purple. The upper part of the petal is fuchsia, but the bottom and a little along the edges are yellow. See how to color the petal on our photo tooltip.
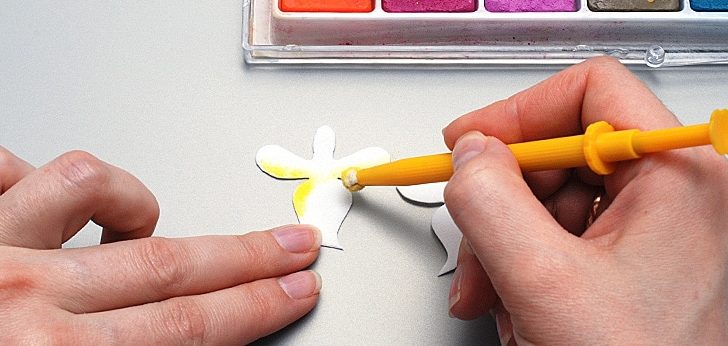
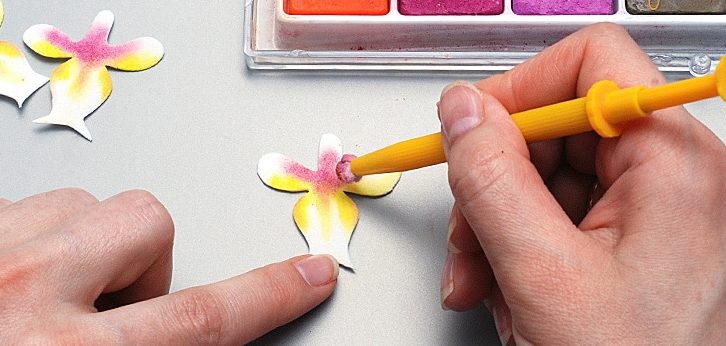
When the painting is left behind, then we wear dots on the petals, imitating the real pattern of orchid petals. The following photo shows how you should get a petal from the front and from the back.
Step 3
We heat our petals on the iron and form our flowers. You should end up with such details. To make the veins, you need to draw the veins or make an imprint of them with a crochet or blunt part of the tweezers while the material is warm.
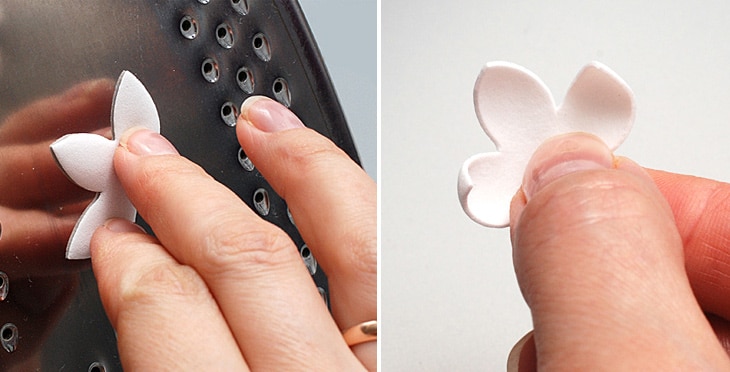

Each tip of the petal should be pulled out a little, as if sharpening it. Next, we continue to work with details, forming sepals in the same way. And in order to properly make the lip of an orchid, you need to attach it with the front side to the iron, and then form a groove on it, as indicated in the photo.

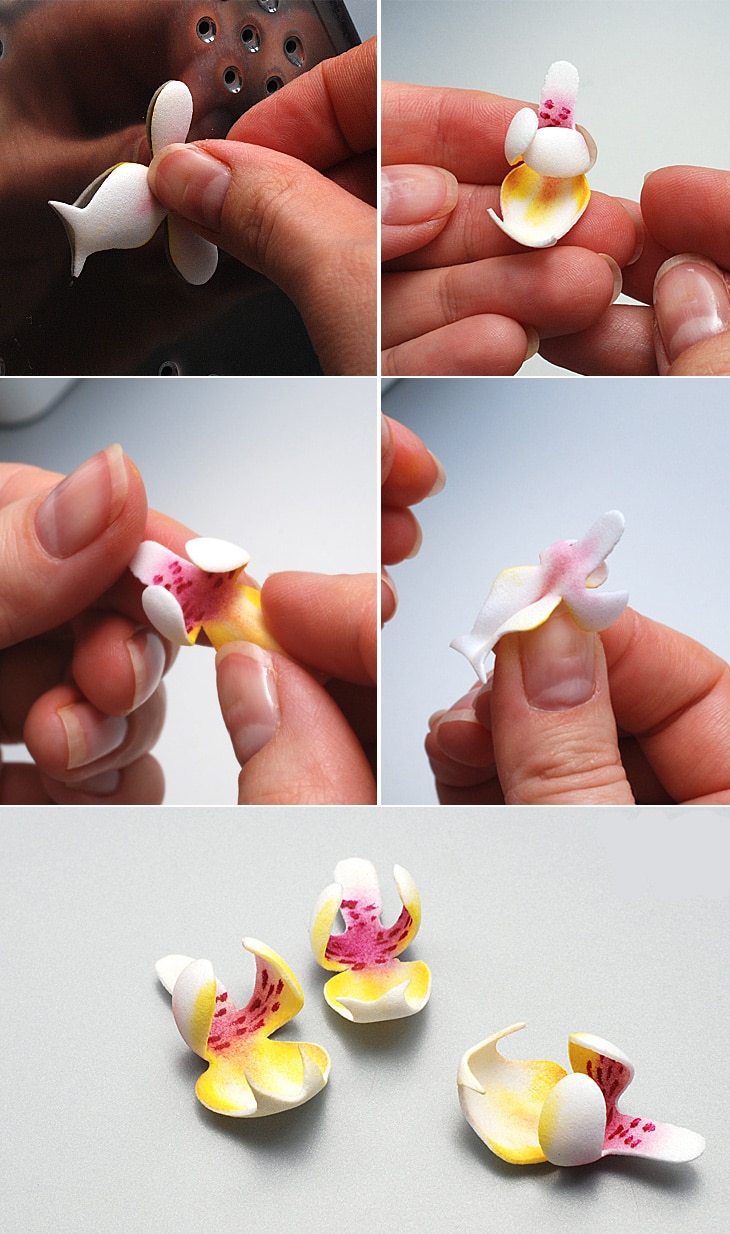
Step 4
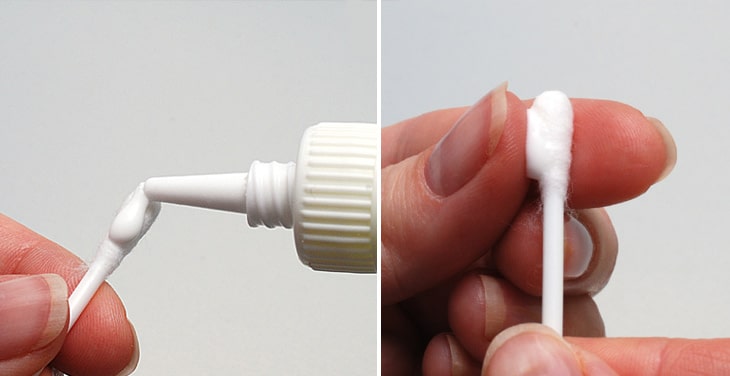
Now we take a cotton swab and put glue on it. Then we cut off the head with cotton and go to the wire. The tip of the wire needs to be bent a little to get a small hook. Lubricate it with glue and thread it into a cotton head.
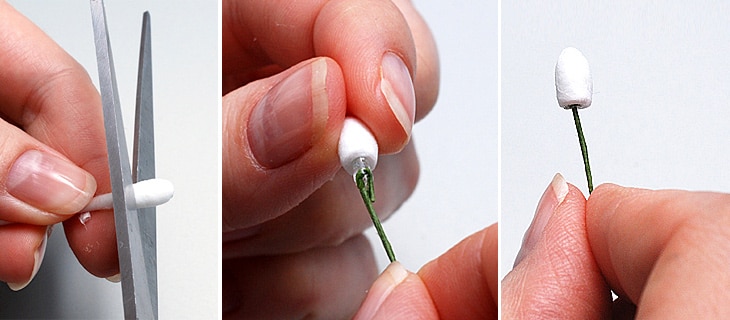
Next, you need to glue the lip to it, and then the side petals and sepals. Look at the photo hint to make it easier for you to collect your flower. When the bud is formed, then all subsequent cotton heads must be painted in gold color.
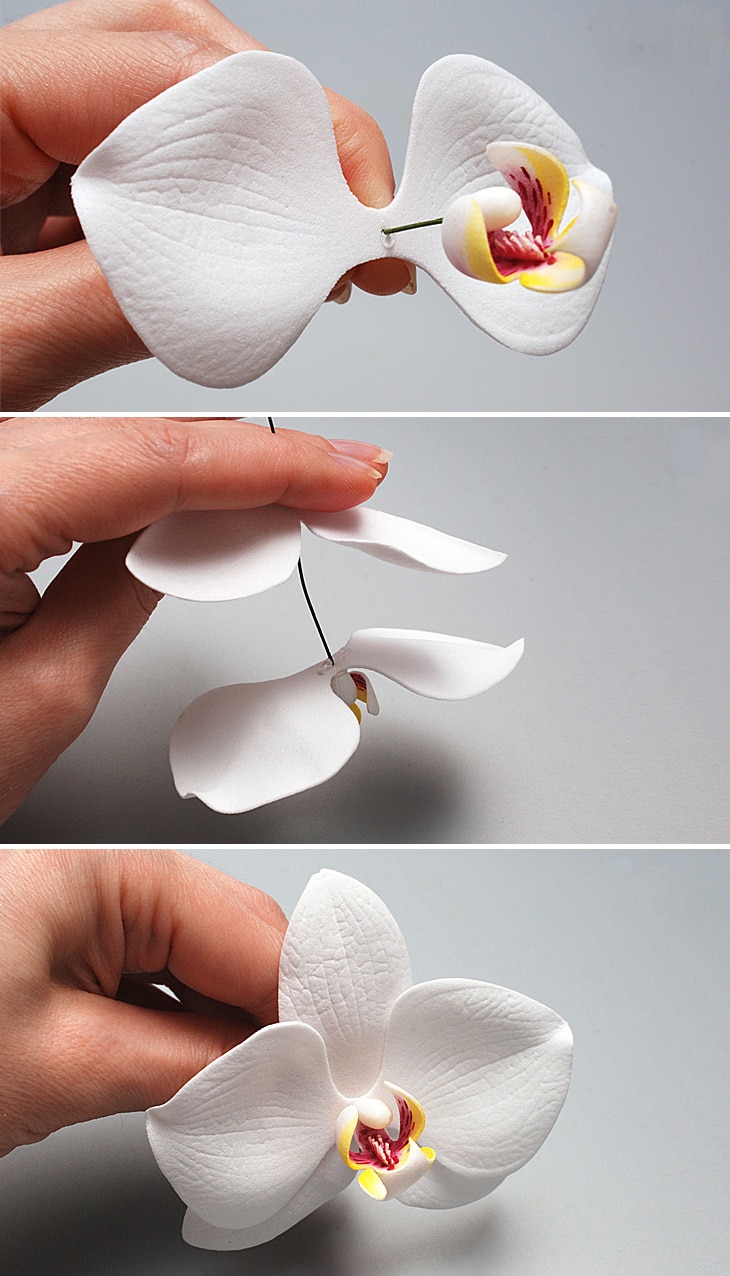
After we wrap the wire with tape tape. The top of the wire is light green, while the bottom is dark green. Put the finished orchid in a vase, and none of your friends will notice the difference between it and the real flower.