Essential tools for doing home manicure
IMPORTANT! So, before you start performing a manicure at home, you need to make sure that all the tools are in stock and properly prepared.
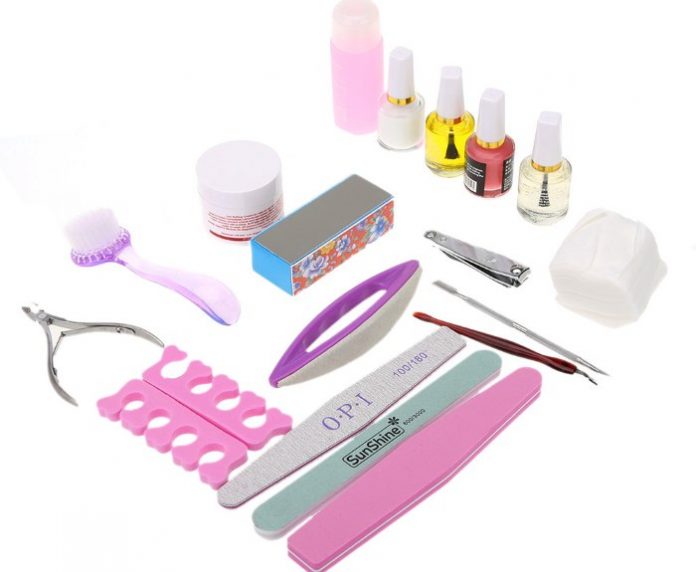
In order to perform a manicure at home, the following tools are needed:
- Nail file. Currently, there are a huge number of various varieties of nail files. However, it should be remembered that just one will be enough to perform just a home manicure. But it should be perfectly matched precisely to your nails. In order to choose the right nail file, you need to be guided by one simple rule:The thinner the nail plate, the smaller the abrasive coating of the nail file.
- Buff Buff. A polishing buff is a special rectangle of soft material designed to polish a nail plate. This process will seem superfluous to some, but competent nail service masters never neglect it. They know that only on a high-quality polished nail does the coating lie smoother and last longer.
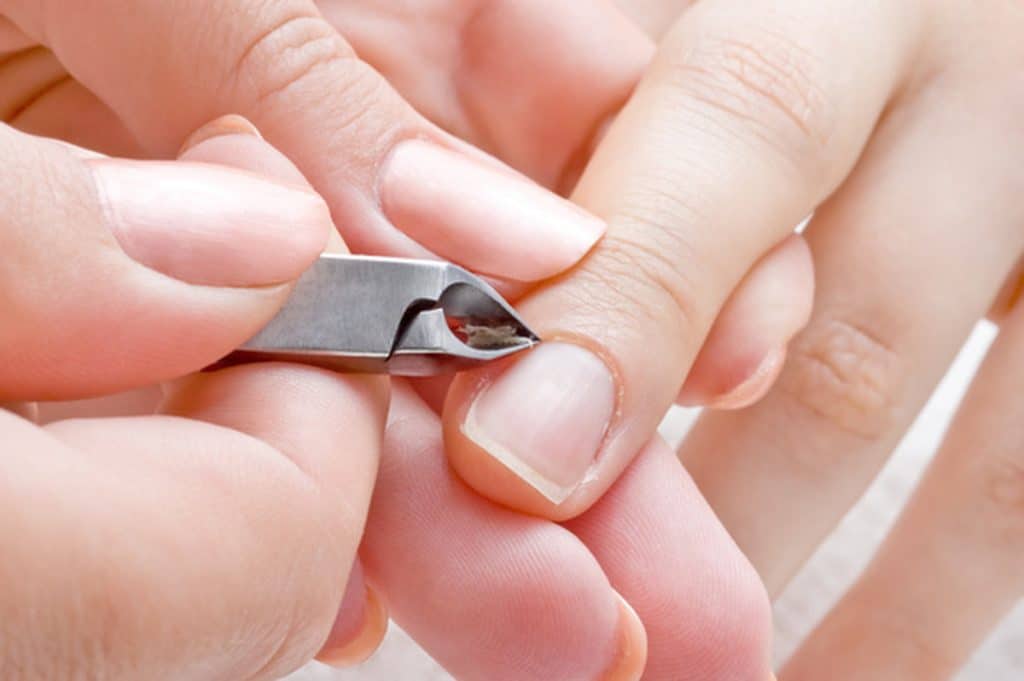
- Nail clippers. Instead of scissors, it is better to give preference to nippers. They are needed in order to carefully cut the overgrown cuticle. However, modern cutter options are multifunctional. They have the ability to both adjust the length and cut the cuticle.
- Cuticle sticks. It is preferable to choose sticks from an orange tree, however, at present it is becoming increasingly difficult to find a quality product. However, if you wish, you can search and find a really high-quality thing.
- Nail polish remover. Do not fall for the tricks of marketers and buy expensive liquid with any additives to strengthen the nails. This is all a hoax! Not a single nail polish remover strengthens the nail and does not saturate it with microelements and vitamins. Therefore, you can buy the most ordinary, inexpensive.
- Cuticle remover. Another thing that you really can not do without when performing a manicure. This tool softens the overgrown cuticle and helps to better clean the nail plate.
Of course, this is not the whole list of manicure accessories. In specialized salons you can offer a lot of various accessories. However, if you just decided to start mastering all the subtleties of manicure art, then the above set will be more than enough for you.
Common mistakes when performing a home manicure
Before proceeding directly to the step-by-step instructions for performing manicure at home, you need to familiarize yourself with the typical mistakes that beginners make and try to exclude them in the future.
Excessive polishing of the nail plate.Beginners, as a rule, start too hard on polishing nails, thereby damaging the nail plate very much. There must be a measure in everything!
Cutting nails with scissors. Professional masters know that cutting the length too often with scissors is fraught with delamination of the nail plate. To avoid this, it is recommended to use a nail file to shorten the length of the nails.
Cutting the skin along the nail roller. A typical mistake of all beginners is to cut off the skin near the roller. Of course, this cannot be allowed, in view of the fact that after cutting, the skin begins to dry and crack. The coarsened skin must be treated with a nail file, and then smeared with a softening cream or oil.
Step-by-step instructions for performing home manicure
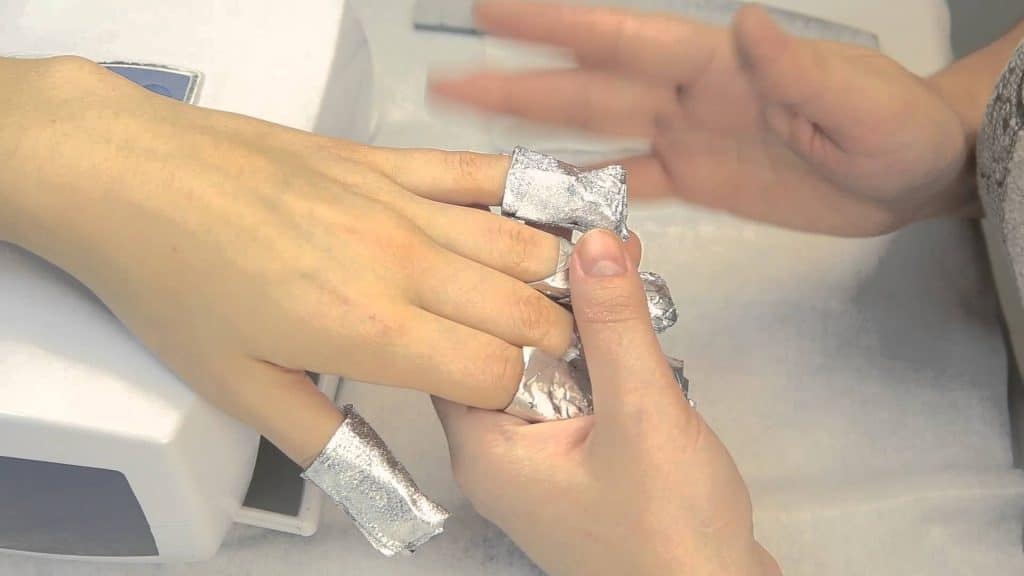
- Removing the old coating. Before proceeding directly to the processing of nails, it is necessary to get rid of the old varnish coating. To do this, use nail polish remover. If your coating is made with gel polish, you must perform the following steps: apply gel polish remover to a piece of cotton pad and put on a fingernail, press firmly and wrap your finger in foil, wait a few minutes, and then carefully remove the coating with a nail file.
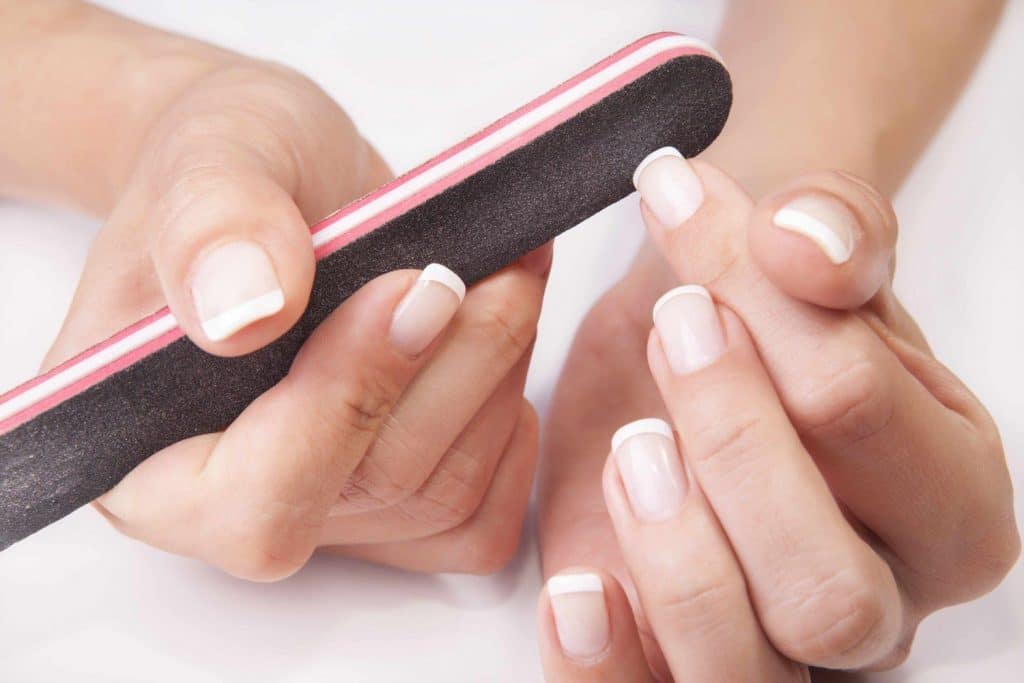
- Giving the necessary length and shape. After removing the old coating, the nails must be given the desired length and shape. This procedure is performed using the same nail file. Remember to polish the tip of the nail with a buff to avoid delamination. It is necessary to file nails from the edges to the middle, alternately each siderather than a simple left-right movement.
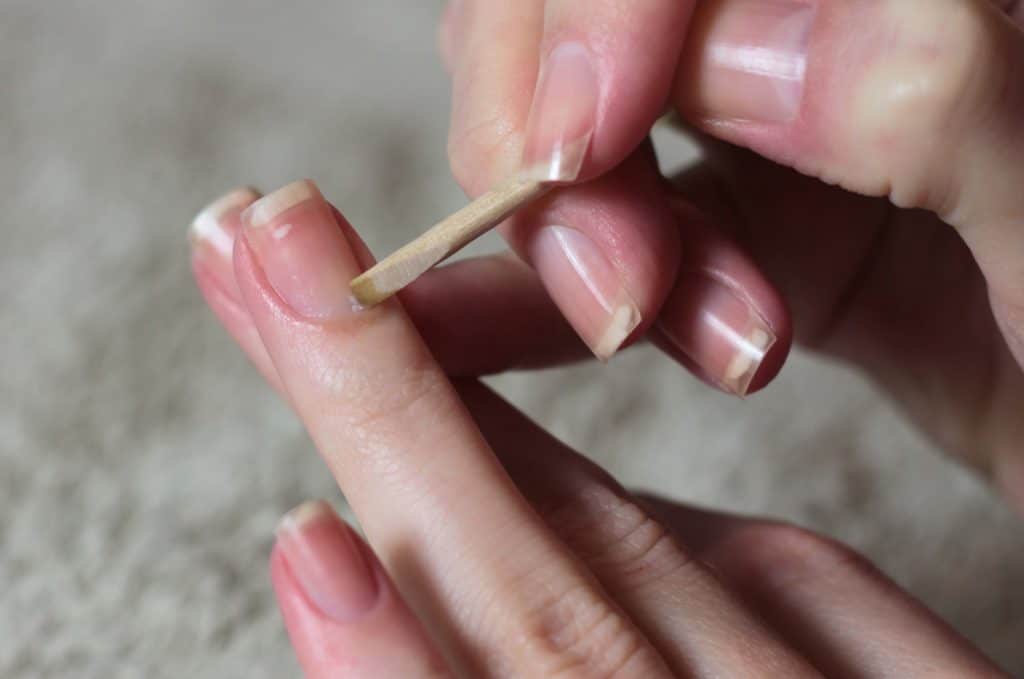
- Cuticle processing 1st option. After all the manipulations with the length of the nails, you should proceed to the processing of the cuticle. To do this, first it must be softened using a special cuticle remover - removers. A remover is applied to the cuticle and is evenly distributed not only throughout the cuticle, but also along the side coarsened coars. The remover begins to work in a couple of minutes, so you need to apply it alternately on one or two fingers so as not to overexpose and not damage the skin. Once the remover has worked, you can remove the cuticle with the help of orange sticks. At the end, the remover must be washed off and wiped dry with a lint-free cloth.
- Cuticle processing 2nd option. There is another way to treat cuticles. To do this, first hold the nails in a bath of hot water for 3 to 5 minutes. You can add sea salt to the water or make a decoction of any herbs. After the cuticle has softened, it must be carefully moved away from the nail with a nail file or a special stick. Then very carefully, without sharp movements, cut the cuticle with nippers. In the end, you can specially apply oil to the cuticle that will nourish the nails and the skin around them. After this, the oil should be gently wiped, and the nails degreased.
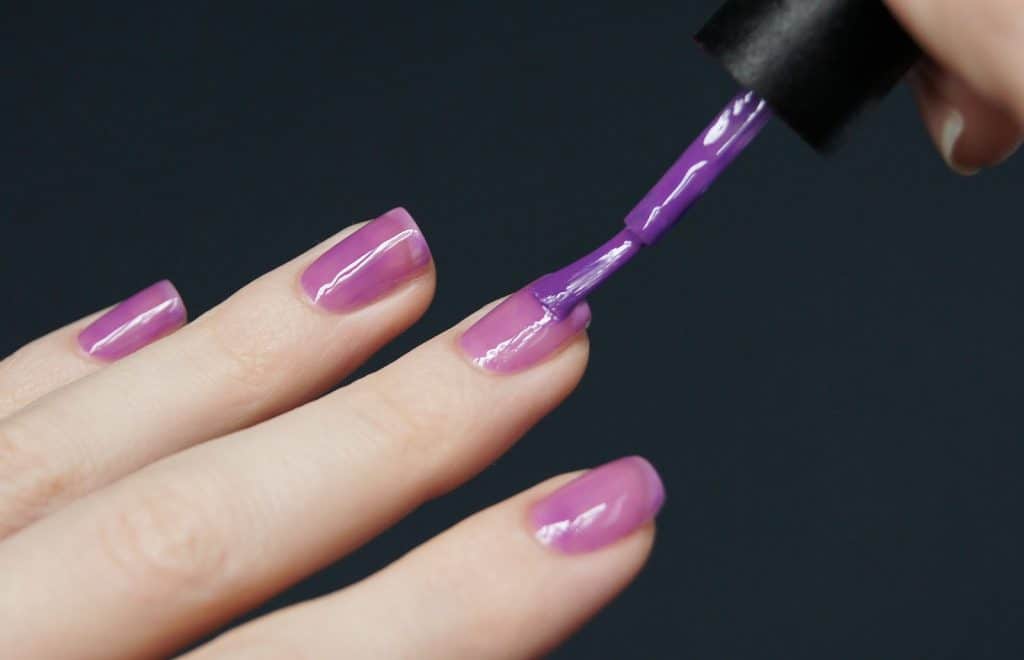
- Coating. First you need to apply a base coat that will strengthen the nail and protect it from the harmful effects of varnish. After that, we move on to staining the nails. The application of the first coat of varnish should begin with the little finger and make it in five movements. No need to brush several times on the nails !!! The second layer of varnish is applied from the cuticle and stretched to the edges. After all layers have dried, the nails are covered with a top so that the coating lasts longer.